Poor drainage can easily cost you significant property and home repairs. It’s an area that few people miss out on during DIY fixes or professional construction, thus causing standing water around the compound. But what happens if you notice a water pool or low spot at the end of the driveway or your parking lot after a rainy night?
You’ll understand what to look for regarding water puddles causes, consequences, and temporary and permanent fixes. With these solutions, you can adequately analyze your problem’s extent and know which solution best fits it.
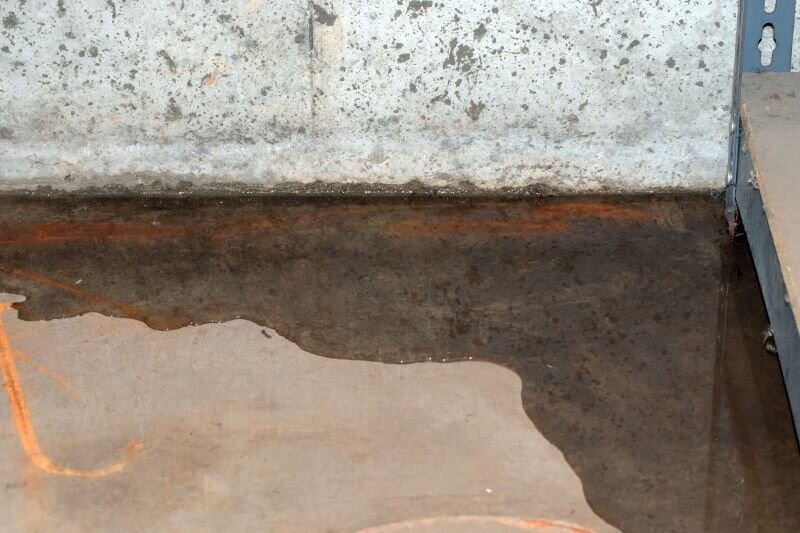
Remember, water pools have severe mold consequences on houses if the dampness spreads toward the house and could be an issue when completing a home inspection checklist.
If you are a homeowner, check out these drainage solutions insights on water pooling fixes.
How Water Pools at the End of a Driveway
Water pooling at the end of a driveway is a common occurrence that can result from several factors. One of the primary reasons is poor drainage, which causes water to accumulate in low-lying areas such as the end of a driveway.
Another reason is the inadequate slope or pitch of the driveway, which prevents water from running off properly. The presence of cracks or gaps in the driveway can also contribute to water pooling as it seeps through these openings and accumulates at the end.
Water pooling can cause several problems for homeowners, including safety hazards, damage to the driveway, and potential flooding of nearby structures.
Causes of Water Pooling at the End of a Driveway
The leading cause of water pooling is poor driveway drainage installation, poor construction or craft, and damage to the driveway and surrounding landscape.
A simple warp in the landscape or using inadequate drainage tools and equipment causes water to collect at the end of the driveway. Let’s look at the common fixes for water pooling.
Can Water Pooling Be Fixed?
Water pooling can be fixed by identifying the underlying cause of the problem. In many cases, water pooling occurs due to improper grading of the land or clogged gutters and downspouts, which prevent proper drainage. A well-laid driveway goes a long way if you need to sell a house fast in Green Bay or getting buyers in Oshkosh.
How To Fix Water Pooling on Your Driveway
When dealing with water pooling, be keen on the permanence and reliability of your solution. Some may require proper landscape analysis before digging or constructing the proposed structure for an answer.
Each solution will have a different impact on your final driveway appearance. A temporary fix would be redirecting the stormwater off the driveway using temporary dug-out trenches. But if you’re looking for a permanent solution, you’ve got to look into other options like drain channels, french drains, and swales.
You can hire out the project or do it yourself through research and understanding the problem and solution. Check out these solutions for water pools in your driveway.
French Drain Pipe
French drain pipes divert water to the basement using pipes, gravel, and fabric to prevent it from clogging or pooling in one area. It uses perforations like holes or slits on the pipes to steadily let water sip through the drainage or trench. To install french drain pipes, consider the following steps.
Understand Your Landscape
Do your groundwork diligently. Consider the correct mapping of the proposed reroute trench. It should be away from your house and other structures like fences or the backyard. Choose a downward slope that utilizes gravity for a constant water flow toward the exit point.
Get Your Supplies
Jot down what you need for the installation. The basic materials include gravel, fabric, the correct pipe size, and the trenches’ equipment.
Start Digging the Trenches
The standard trench size for drain pipes should be at least 2 inches wide and 6 to 18 inches deep. Be wary as you dig, as it lays the foundation of how you lay your pipes.
Layer the Gravel
Layer the gravel to about 3 inches deep all through the trench. Then, place the landscape fabric to cover the stone through the groove.
Cover Your Trench
Fill the soil back in the trench using sand and topsoil. Add a few handfuls of sand at the open ends to avoid clogging and cover them.
With French drains, there’s increased assurance of relieving the current soil or driveway structure from absorbing the pooled water. Once it starts collecting at your driveway, it gives the water an escape route to your chosen end point.
Installing a french drain will cost you at least $ 1000. But it’s a reliable solution as you won’t have to change much of your driveway or property. It’s easy to install and takes a short time to get it working.
Dry Well
A dry well offers a good end point where it can slowly but safely disperse the collected water into the soil. People use it as an endpoint for french drains to collect the water from these drains and spread it into the subsoil.
Consider these steps when making a dry well:
- Choose a preferred location based on the type and composition of the soil. The subsoil should be able to handle large volumes of water without getting saturated easily.
- Get a specific design for the dry well which allows you to budget and buy the materials timely and correctly
- Dig the hole based on your well’s measurements. Most people prefer having deep holes which give water ample time to seep through the soft soil into the dense layers of the subsoil without getting clogged
- Line the hole using a fabric liner. An easier way would be to close off one end of the fabric and fill in gravel. Then put the gravel filled fabric liner in the hole. Line the fabric against the holes’ walls, so there are no creases or interferences.
- Alternatively, you can line the hole with the fabric and then fill it with gravel
- Large and small dry wells have different designs. Large dry wells will mostly have an overflow emitter that allows water to move through the drainage pipes to an extra compartment to avoid clogging
When installing pipes into the dry well, have them at an angle that will benefit from gravity. It’s best to fit it snuggly into the dry well as a downspout for maximum efficiency. It acts as the perfect storage area during the rainy season, taking away the excess water and holding it before distributing it to the dense soil underneath.
Dry Creek Bed
A dry creek bed can blend perfectly in your lawn or vegetation easily. Dig trenches from the ‘driveway pool’ towards the exit where the water can slowly deep and disperse beneath. You can take it as a functional and aesthetic solution for your water pooling problem. It primarily relies on a sloppy gradient to get the water flowing from the pool.
Lay down stones and boulders on the fabric liner laid out on the trench. You can alternate boulders or shrubs and vegetation to bring in the natural landscape appearance. Water will flow down to the percolation point during rainy seasons.
Drainage Channel
Channel drains provide an exit point for water to flow from the driveway’s lowest end of the water pool. It’s a break on the driveway surface where you dig and install channel drains for water to flow into the drainage away from the driveway. If this is too expensive, feel free to add it to things not to fix when selling a house.
Swale
Swales are almost similar to ditches, but they slope on either side. They’re also not quite deep but are wide to compensate for their shallowness. To build a swale, identify the runoff and slope conditions of the water from the driveway.
Dig ‘U’ shaped trenches and fill them with gravel to the endpoint. Cover the trench using topsoil.
Soak Away
A soak away is a ‘storage’ area that allows excess water to flow into them to avoid water pooling. It’s an engineered structure that involves digging out soil and setting up crates. Follow these steps when installing soakaways:
- Excavate the area
- Prepare the crates by securing them ready for installation
- Fill the excavated area with gravel and sand. Place a fabric liner on the base
- Lower the crates after securing them with the geotextile membrane
- Fix the drainage system in the crates
- Fill the remaining areas with sand
- Cover the crates and fill the area with the removed soil
Permeable Paving
Permeable paving allows construction experts to introduce vegetation or materials that allow water to seep into the soil. As a result, more water will be absorbed by the ground instead of it collecting at the end of the driveway. Consult experts and let them design and plan for this revamp.
Also, check your driveway surface texture. A smooth surface promotes smooth water runoff. Thus, water won’t stagnate in an area. To prevent pooling, ensure the rough patches and puddles are well dealt with in the hotter seasons.
Conclusion
In conclusion, water pooling at the end of a driveway can cause numerous problems for homeowners, including safety hazards, damage to the driveway, and potential flooding of nearby structures.
The solutions range from temporary fixes like digging temporary trenches to permanent solutions like installing French drain pipes or a dry well.
Overall, homeowners can attract cash home buyers in Wisconsin by being aware of the importance of good drainage to prevent water pooling and potential damages that come with it.